


This tutorial guides you through using the AI-Assisted Brainstorming tool, to create and edit interactive mind maps for enhanced brainstorming and idea organization. Follow the steps below to navigate the tool and generate a mind map using AI-driven insights. The process is intuitive, with editing options at multiple stages and a strong emphasis on refining the final mind map using an integrated editor.
Step-by-Step Guide
Step 1: Access the AI-Assisted Brainstorming Tool
-
Navigate to Tools in the main menu.
-
Select Apps from the dropdown.
-
Choose AI-Assisted Brainstorming.
-
Click Start Now to open the tool.
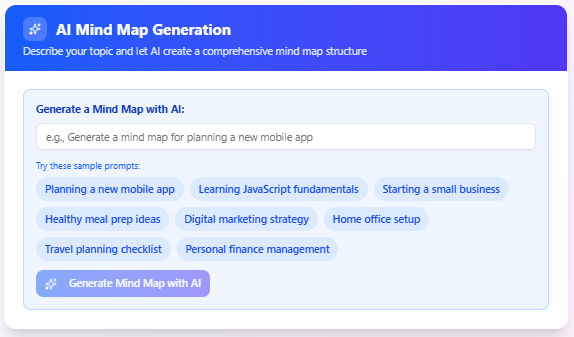
Step 2: Provide Topic Description
-
In the AI-Assisted Brainstorming interface, locate the input field for the topic description.
-
Enter a brief description of the topic or idea you want to brainstorm (e.g., “Planning a marketing campaign” or “Developing a new app”).
-
Click Generate Mind Map with AI to proceed.
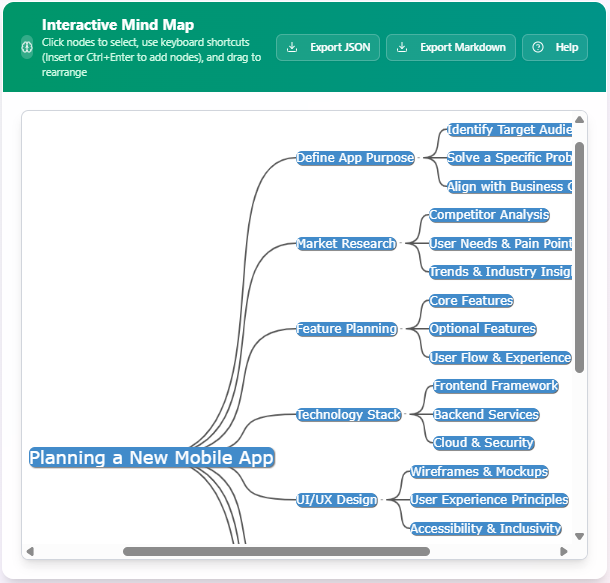
Step 3: Generate and Edit Mind Map
-
The AI analyzes your input and generates an interactive mind map with nodes representing key ideas, subtopics, or tasks.
-
Review the generated mind map to ensure it aligns with your brainstorming goals.
-
Edit the mind map in-place to refine it:
-
Select a Node: Click on any node to select it for editing or rearranging.
-
Use Keyboard Shortcuts: Use the following hotkeys for efficient editing:
-
Add Child Node: Insert or Ctrl + Enter – Creates a new node as a child of the selected node.
-
Add Brother Node: Enter – Creates a new node at the same level as the selected node.
-
Edit Node: F2 – Allows you to edit the text of the selected node.
-
Delete Node: Delete – Removes the selected node and its children.
-
Toggle Node: Space – Expands or collapses the selected node to show or hide its children.
-
Move Left: Left Arrow – Moves the selected node to the left (if applicable).
-
Move Up: Up Arrow – Moves the selected node upward in the hierarchy.
-
Move Right: Right Arrow – Moves the selected node to the right (if applicable).
-
Move Down: Down Arrow – Moves the selected node downward in the hierarchy.
-
-
Rearrange Nodes: Click and drag nodes to reorganize the structure of the mind map.
-
-
Once satisfied, proceed to export options or continue refining.
Step 4: Export Mind Map
-
Export as JSON:
-
Click the Export as JSON button to save the mind map’s structure, including all nodes and their relationships, as a JSON file.
-
Download the file for backup or use in other applications.
-
-
Export as Markdown:
-
Click the Export as Markdown button to convert the mind map into a hierarchical Markdown format.
-
Download the .md file for documentation or sharing purposes.
-
Best Practices
-
Keep Descriptions Concise: Use clear and concise topic descriptions to help the AI produce relevant nodes.
-
Leverage Shortcuts: Familiarize yourself with the keyboard shortcuts to speed up editing and navigation.
-
Organize Regularly: Periodically rearrange nodes to maintain a clear and logical structure as your ideas evolve.
-
Export Frequently: Save your work as JSON or Markdown files to avoid losing progress and to share with collaborators.
Conclusion
The AI-Assisted Brainstorming tool empowers you to generate, edit, and organize ideas efficiently with AI support. By following the steps outlined in this tutorial, you can create dynamic mind maps, customize them with ease, and export them for further use. Start exploring the tool today to enhance your brainstorming process!